




Search
Related News
- 00
0000-00
How to Select Agricultural Irrigation Solutions for Water-Limited Farms - 00
0000-00
How to Select Food Plant Sanitation Equipment for High-Risk Processing Areas - 00
0000-00
Selecting Meat Packaging Technology to Extend Shelf Life and Control Leakage - 00
0000-00
Selecting Secondary Dairy Packaging Systems for Hygienic, High-Speed Distribution - 00
0000-00
How to Design Greenhouse Irrigation Zones for Uniform Watering and Lower Waste
What Maintenance Schedule Do Commercial Grow Lights Need?




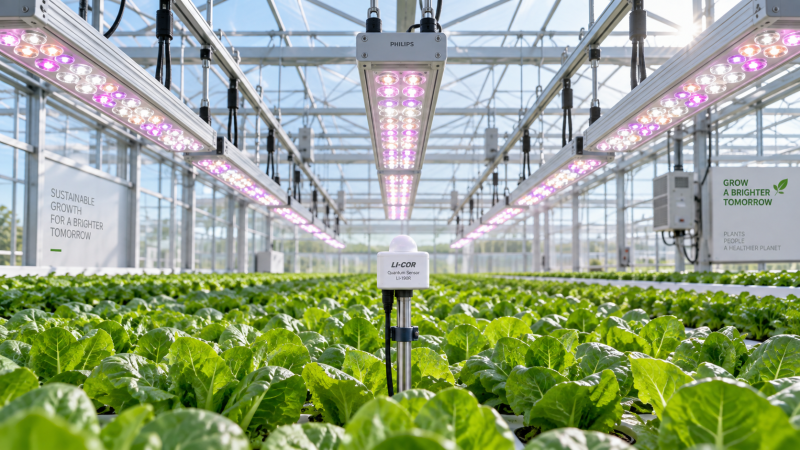
Commercial grow lights do not need constant intervention, but they do need a defined maintenance schedule. The practical objective is not simply to keep fixtures operating. It is to preserve usable photon delivery at canopy level, maintain electrical safety, avoid heat-related failures, and detect performance drift before it becomes a crop-uniformity problem.
For most LED installations, a sensible baseline is: visual checks each week, cleaning and environmental inspection every month or production cycle, electrical and mounting checks every quarter, and a documented light-performance review at least annually. High-humidity greenhouses, dusty propagation rooms, livestock-adjacent facilities, and vertical farms running long photoperiods may need shorter intervals. The manufacturer’s instructions, fixture IP rating, warranty conditions, local electrical rules, and the site’s own risk assessment should always take precedence over a generic schedule.
Maintenance should follow the production environment, not just the calendar
A fixture in a clean, sealed vertical farm is exposed to very different conditions from one mounted above a greenhouse crop. Dust, spray residues, condensation, sulfur-containing compounds, fertilizer aerosols, insects, and fluctuating temperatures all change the inspection burden. Hours of operation matter as well. A lighting system operated for 18 hours a day accumulates operating stress much faster than one used for short-day supplementation during winter.
The useful question is therefore not only, “What maintenance schedule is recommended for commercial grow lights?” It is also: what conditions are most likely to reduce light transmission, damage connections, compromise cooling, or create uneven crop exposure at this facility?
Maintenance intervals should be tightened when any of the following are present:
- High relative humidity or recurring condensation near fixtures and wiring.
- Frequent foliar spraying, fogging, or use of cleaning chemicals in the growing area.
- Dust from substrates, dry handling operations, nearby construction, or air intake systems.
- High-temperature ceilings, limited air movement around heat sinks, or enclosed fixture layouts.
- High operating hours, including multi-layer vertical farms with near-daily lighting schedules.
- Previous failures involving drivers, connectors, corrosion, breakers, or control-network interruptions.
A schedule that does not account for these conditions can look adequate on paper while allowing gradual performance loss to pass unnoticed.
Weekly: check for obvious faults and crop-facing symptoms
Weekly checks are generally quick and can be integrated into normal crop and facility rounds. They should focus on visible defects, abnormal operation, and changes that could affect a growing zone immediately.
Inspect fixtures for dark sections, intermittent operation, flicker, discolored lenses, loose hanging hardware, damaged cable jackets, and signs of water entry. Check that drivers and junction boxes are secure and that no connector is under tension. Where lighting is dimmable or centrally controlled, confirm that programmed on/off times and dimming levels match the intended crop recipe.
Crop observation belongs in this routine. A lighting fault may first appear as uneven internode length, inconsistent leaf color, delayed development, or a visible boundary between crop zones. These symptoms do not prove a lighting issue; nutrition, irrigation, airflow, and disease pressure may produce similar results. But a repeated pattern directly beneath one fixture row, or an abrupt change at a lighting-control zone, warrants investigation.
Weekly inspections should also review alarms or controller logs where the system provides them. Repeated communication losses, driver faults, over-temperature alerts, or unexpected dimming events should not be treated as minor inconveniences. A fixture that resets once may have a transient issue; a recurring event can indicate power quality, moisture ingress, thermal stress, cable damage, or a control-system configuration problem.
Monthly or between crop cycles: clean optical surfaces and assess the environment
Dirt on a lens or protective cover does not merely make the installation look neglected. It blocks and scatters light before it reaches the crop. The resulting loss may be uneven because deposits accumulate differently around fans, vents, aisle edges, and irrigation zones. In a dense vertical farm, small losses across many fixtures can materially affect the uniformity of a tightly managed light recipe.
Cleaning frequency should reflect actual deposition. A monthly inspection is a reasonable starting point, but some sites may find that fixtures remain clean for longer, while others require attention after every crop cycle or after dusty activities. The correct interval is the one that prevents meaningful buildup without exposing equipment to unnecessary handling or moisture.
Before cleaning, isolate power in accordance with the site’s electrical safety procedure and allow fixtures to cool. Use a soft, non-abrasive dry cloth or a method specifically approved by the manufacturer. Do not assume that a fixture’s ingress-protection rating permits high-pressure washing or direct spraying. An IP rating describes protection under defined test conditions; it is not a blanket authorization for every sanitation practice, nozzle pressure, chemical, or water temperature.
Avoid abrasive pads, strong solvents, and unapproved disinfectants. These can cloud lenses, weaken gaskets, degrade coatings, or create stress cracking in polymer components. If a facility uses sanitation chemicals for other equipment, compatibility with fixture lenses, seals, cable glands, and mounting materials should be confirmed before those chemicals are applied nearby.
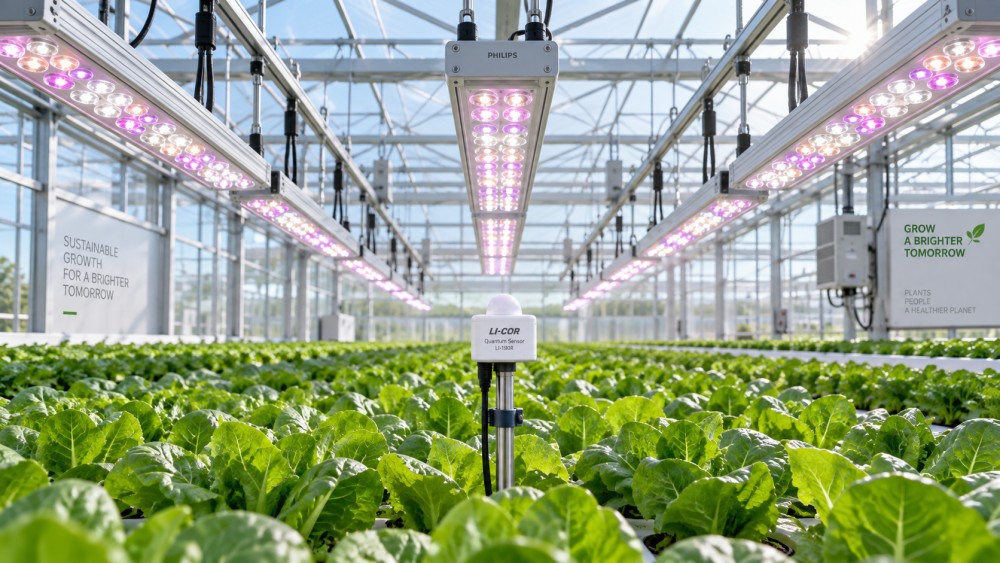
Monthly rounds should also assess the area around the lights. Look for blocked air paths, dust-coated heat sinks, water dripping from roof structures, condensation on cable runs, and crops or trellis systems that have moved too close to the fixtures. LED fixtures are more efficient than older lighting technologies, but their drivers and diodes still depend on thermal management. A clogged heat sink or poor airflow can accelerate component aging even when the fixture continues to illuminate.
Quarterly: inspect electrical connections, mounting, and controls
Quarterly inspection is the point at which the maintenance program becomes more than a cleaning routine. It should include a deliberate examination of physical security, electrical integrity, and control performance. This work should be completed by competent personnel following applicable site safety procedures.
Check suspension cables, brackets, rails, anchors, and fasteners for movement, corrosion, deformation, or fatigue. Greenhouse structures can experience vibration, humidity cycles, and thermal expansion. In stacked farms, regular access activity and equipment movement can gradually affect mounting hardware or cable routing. Fixtures must remain positioned as designed because changes in height, tilt, or spacing alter photon distribution and can produce localized hot spots or low-light areas.
Inspect accessible connectors, cable glands, junction boxes, and power leads for discoloration, cracking, corrosion, loose engagement, or moisture. Any evidence of overheating deserves immediate attention. Heat damage at a connector may result from a loose termination, overloading, poor contact quality, an incompatible component, or a wider electrical issue. Replacing only the visibly damaged part without identifying the cause can lead to recurrence.
Where permitted by equipment documentation and local safety requirements, qualified personnel may verify supply voltage, grounding continuity, protective-device condition, and driver operation. The exact tests should be determined by the electrical design, not copied from a generic checklist. A central lighting installation may also require review of panels, contactors, relays, emergency shutoff arrangements, surge-protection devices, and network gateways.
Control systems need attention during the same interval. Confirm that fixture groups respond consistently to dimming commands, scheduled recipes, daylight-harvesting signals, and emergency settings. Changes to a climate computer, building-management platform, network switch, firmware version, or lighting controller can create a mismatch between the intended and delivered lighting program. Configuration backups and a clear record of changes reduce the risk of losing validated crop settings after a controller replacement or software update.
Measure light at canopy level, not only at the fixture
A grow light can appear bright and still fail to deliver the required distribution or intensity to the crop. Visual inspection is valuable, but the crop responds to photosynthetic photon flux density (PPFD), photoperiod, spectrum, and uniformity at canopy level—not to how bright fixtures look from an aisle.
At least once each year, and after material layout changes or recurring crop-uniformity concerns, measure lighting in representative zones using a suitable quantum sensor and a documented grid. The results should be compared with the approved lighting design or crop recipe. Measurements should be made at the relevant canopy height, with the lighting state and daylight conditions clearly recorded. In greenhouses, natural light must be considered; readings taken at different times or weather conditions are not directly comparable unless the method accounts for daylight contribution.
The review should look beyond the average PPFD. A high average can conceal poor uniformity if some points are substantially above or below the target. Comparing zones over time is often more useful than focusing on a single reading. A decline in one zone may point to lens contamination, fixture failure, altered mounting height, a dimming-control issue, or shading from newly installed infrastructure.
Annual light validation is also a practical point to review daily light integral (DLI) assumptions. DLI is determined by PPFD and lighting duration, so a revised photoperiod, dimming strategy, crop spacing, or canopy height can change the delivered dose even if the fixtures themselves are operating normally. Maintenance and crop management should not be treated as separate systems when lighting is a major production input.
Driver replacement and fixture end-of-life planning
Commercial LED systems are often described using rated lifetime figures, but those figures require careful interpretation. A stated lifetime may refer to projected lumen or photon maintenance under specified ambient conditions and operating assumptions. It does not mean every driver, connector, seal, or control component will remain fault-free for that same period. Nor does it guarantee that the remaining output is sufficient for a particular crop program.
Drivers are frequently the component most sensitive to heat, voltage conditions, and electrical transients. Replacement planning should therefore include an inventory strategy for critical drivers, connectors, fuses where applicable, control modules, and fixture-specific mounting or sealing parts. Keeping a limited set of verified spare parts can reduce downtime, but substitute components should not be selected solely because they fit physically. Electrical ratings, dimming protocol, ingress protection, thermal characteristics, and warranty implications must be considered.
Replacement decisions are stronger when based on recorded evidence: fault history, output measurements, repair frequency, energy performance, and the operational value of maintaining a consistent crop recipe. A fixture may still function but no longer be suitable if its output or distribution falls below the production requirement. Conversely, replacing an entire installation because a small number of drivers fail may be premature if the lighting design remains fit for purpose and parts support is available.
Recordkeeping turns maintenance into an operating control
A maintenance log should identify fixture locations, installation dates, operating hours where available, cleaning dates, faults, repairs, replacement parts, control changes, and canopy-level measurement results. Photographs of corrosion, water ingress, cable damage, or recurring deposits can help distinguish isolated incidents from developing patterns.
This record has practical value beyond compliance documentation. It allows operators to see whether failures cluster by zone, fixture batch, installation period, or environmental condition. It also helps separate lighting-related causes from broader production issues. When a crop team reports uneven performance, a reliable history of PPFD checks, control settings, and fixture repairs narrows the investigation much faster than visual assumptions.
For multi-site operations, consistency in record format matters. A maintenance interval described as “checked regularly” cannot be compared across facilities. A defined task, date, responsible person, observed condition, corrective action, and verification result creates information that can support both technical troubleshooting and lifecycle planning.
Common maintenance mistakes that reduce system value
The most damaging mistake is waiting for complete fixture failure. Light loss from contamination, a partially failed diode array, incorrect dimming, or shifted mounting geometry can affect crop consistency long before a breaker trips or a fixture goes dark.
Another frequent error is applying general building-cleaning methods to horticultural lighting. Water pressure, chemical residue, and inadequate drying can create failures that are more costly than the dirt being removed. Cleaning procedures need to be compatible with the specific fixture design and the facility’s sanitation regime.
It is also risky to treat electrical inspection as a purely reactive task. In wet or corrosive environments, a small seal failure or loose cable gland can become a serious fault if not identified early. The right response is not excessive disassembly of every fixture, but scheduled inspection focused on known exposure points and documented fault signals.
Finally, maintenance should not rely on claimed fixture lifetime alone. The relevant performance standard is whether the system continues to deliver the required light quantity and distribution safely, efficiently, and consistently within the crop environment. That standard can only be maintained through routine observation, controlled cleaning, electrical checks, and periodic canopy-level verification.
A well-run schedule is therefore a layered one: frequent visual review to catch immediate faults, regular cleaning based on environmental exposure, quarterly inspection of mechanical and electrical condition, and annual measurement to confirm that the installed lighting still matches production requirements. This approach protects not only the lighting asset, but also the consistency of the production system built around it.